Free U.S. Shipping Sitewide no-minimum
Top searches
Show More
Trending Now
New Arrival
- Best Seller
-
Baseball
- Best Seller
- New Arrivals
- Pinstripe
- Throwback
- 2-Button
- Pullover Baseball Shirts
- Sleeveless
- Crop Tops
- Raglan Sleeves
- Split Fashion
- Two Tone
- Line
- Halloween
- Christmas
- Graffiti Pattern
- Mexico
- Camo
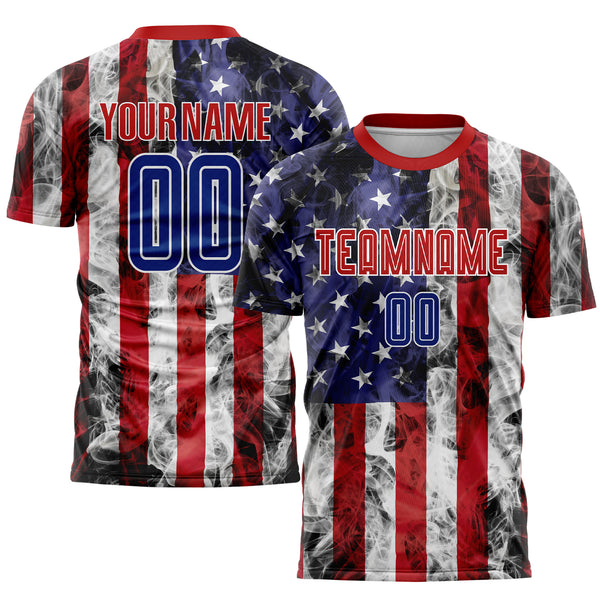
- National Flag
- Drift Fashion
- St. Patrick's Day
- 3D Pattern
- Arm Shapes
- Splash Ink
- Hawaii
- National Beer Day
- Ribbon
- Valentine's Day
- Tie Dye
- Skull Fashion
- Fade Fashion
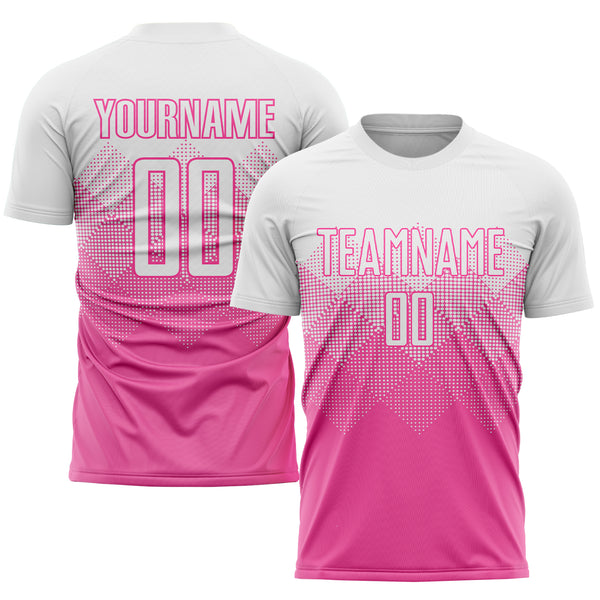
- Gradient Fashion
- Gradient Square Shape
- Star
- Pride
- City Edition
- Back Logo
- Aqua
- Bay Orange
- Black
- Blue
- Brown
- Burgundy
- Cream
- Crimson
- Electric Blue
- Fire Red
- Gold
- Gray
- Green
- Kelly Green
- Light Blue
- Maroon
- Midnight Green
- Navy
- Neon Green
- Old Gold
- Olive
- Orange
- Panther Blue
- Pink
- Powder Blue
- Purple
- Red
- Royal
- Sand
- Steel Gray
- Sky Blue
- Teal
- Texas Orange
- Thunder Blue
- White
- Yellow
-
Football
- Best Seller
- New Arrivals
- Throwback
- Drift Fashion
- Gradient Fashion
- Gradient Square Shape
- Split Fashion
- Graffiti Pattern
- Pink Ribbon
- City Limited
- Aqua
- Black
- Brown
- Burgundy
- Cardinal
- Cream
- Gold
- Grass Green
- Gray
- Green
- Kelly Green
- Light Blue
- Light Gray
- Midnight Green
- Navy
- Neon Green
- Old Gold
- Olive
- Orange
- Panther Blue
- Pewter
- Pink
- Powder Blue
- Purple
- Red
- Royal
- Scarlet
- Silver
- Teal
- Vegas Gold
- White
-
Basketball
- Best Seller
- New Arrivals
- Graffiti Pattern
- Split Fashion
- Gradient Fashion
- Fade Fashion
- Reversible
- 3D Pattern
- Hawaii
- Suit
- Pinstripe
- Black Pinstripe
- Pink Pinstripe
- Red Pinstripe
- Royal Pinstripe
- White Pinstripe
- City Edition
- American Flag
- Mexico
- Tie Dye
- Front Logo
- Pride
- Throwback
- Aqua
- Black
- Blue
- Brown
- Camo
- Cream
- Crimson
- Figure
- Gold
- Gray
- Green
- Hunter Green
- Kelly Green
- Light Blue
- Maroon
- Navy
- Neon Green
- Olive
- Orange
- Pink
- Purple
- Red
- Royal
- Teal
- White
- Hockey
-
Soccer
- Best Seller
- New Arrivals
- Fade Fashion
- Gradient Square Shape
- Long Sleeve
- Split Fashion
- National Flag
- Mexico
- Tie Dye
- Aqua
- Black
- Blue
- Brown
- Camo
- Cream
- Crimson
- Dark Purple
- Deep Pink
- Figure
- Gold
- Graffiti Pattern
- Grass Green
- Gray
- Green
- Kelly Green
- Lakes Blue
- Light Blue
- Navy
- Neon Green
- Old Gold
- Olive
- Orange
- Panther Blue
- Pea Green
- Pink
- Powder Blue
- Purple
- Red
- Royal
- Silver
- Steel Gray
- Sky Blue
- Teal
- Texas Orange
- US Navy Blue
- White
- Yellow
-
Jacket
- Best Seller
- New Arrivals
- Two Tone
- Pinstripe
- Graffiti Pattern
- Back Logo
- 3D Pattern
- Fishing
- Zipper Jacket
- Hoodie Jacket
- Lapel Collar
- Hawaii
- Gradient Fashion
- Gradient Square Shape
- Fade Fashion
- Skull Fashion
- Christmas
- National Flag
- City Edition
- Mexico
- Split Fashion
- Tie Dye
- Leather Sleeves
- Black
- Brown
- Camo
- Cream
- Crimson
- Gray
- Green
- Kelly Green
- Light Blue
- Navy
- Olive
- Orange
- Powder Blue
- Pink
- Purple
- Red
- Royal
- Texas Orange
- White
- Black Pinstripe
- White Pinstripe
-
Softball
- Best Seller
- New Arrivals
- American Flag
- 3D Pattern
- Pinstripe
- Tie Dye
- Gradient Fashion
- Gradient Square Shape
- Aqua
- Bay Orange
- Black
- Brown
- Burgundy
- Camo
- Cream
- Crimson
- Electric Blue
- Gold
- Graffiti Pattern
- Gray
- Green
- Kelly Green
- Light Blue
- Midnight Green
- Navy
- Neon Green
- Orange
- Old Gold
- Olive
- Pink
- Powder Blue
- Purple
- Red
- Royal
- Steel Gray
- Sky Blue
- Teal
- Texas Orange
- Thunder Blue
- White
- Black Pinstripe
- Cream Pinstripe
- Gray Pinstripe
- Light Blue Pinstripe
- Navy Pinstripe
- Red Pinstripe
- Royal Pinstripe
- White Pinstripe
-
Hoodie
- Best Seller
- New Arrivals
- Christmas
- Graffiti Pattern
- Halloween
- Tie Dye
- Split Fashion
- Camo
- Skull Fashion
- 3D Pattern
- National Flag
- Pinstripe
- Fade Fashion
- Gradient Fashion
- Gradient Square Shape
- Fishing
- Hunting
- Line
- Football Hoodie
- Hoodie Jacket
- Anthracite
- Aqua
- Black
- Brown
- Burgundy
- Cream
- Crimson
- Gold
- Gray
- Green
- Kelly Green
- Light Blue
- Navy
- Neon Green
- Old Gold
- Olive
- Orange
- Powder Blue
- Pink
- Purple
- Red
- Royal
- Steel Gray
- Teal
- White
-
T-Shirt
- Best Seller
- New Arrivals
- 3D Pattern
- Hawaii
- Gradient Fashion
- Gradient Square Shape
- Fade Fashion
- Graduation
- Esports
- Long Sleeve
- Halloween
- Fishing
- Christmas
- Camo
- Graffiti Pattern
- Tie Dye
- Pink Ribbon
- Skull Fashion
- American Flag
- Mexico
- Pride
- Aqua
- Black
- Blue
- Brown
- Burgundy
- Cream
- Crimson
- Gold
- Gray
- Green
- Kelly Green
- Light Blue
- Navy
- Neon Green
- Old Gold
- Olive
- Orange
- Panther Blue
- Pea Green
- Pink
- Powder Blue
- Purple
- Red
- Royal
- Steel Gray
- Sky Blue
- Teal
- Thunder Blue
- White
- Yellow
- Shorts
-
Polos
- Best Seller
- New Arrivals
- Vapor
- 3D Pattern
- Pink Ribbon
- St. Patrick's Day
- Bowling
- Billiard
- Poker
- Cornhole
- Tennis
- American Flag
- Graffiti Pattern
- Gradient Square Shape
- Tie Dye
- Christmas
- Skull Fashion
- Aqua
- Black
- Blue
- Brown
- Burgundy
- Camo
- Cream
- Crimson
- Gray
- Gold
- Green
- Kelly Green
- Light Blue
- Midnight Green
- Navy
- Neon Green
- Orange
- Old Gold
- Olive
- Panther Blue
- Pink
- Powder Blue
- Purple
- Red
- Royal
- Steel Gray
- Sky Blue
- Teal
- White
- Yellow
- Volleyball
- Hat
- Pants
- Shirts
- New IN
- Exclusive
- SHOP BY CATEGORY
- Size chart
- HAPPY CUSTOMERS
- Bulk Ordering Program
- support@fansidea.com
- Sign In
Free U.S. Shipping Sitewide no-minimum
0
Your Cart is Empty
-

Bulk Order Service
Toll Free: 1-888-360-8899
Any questions about Bulk Order?
We're here to help.
Call Our Bulk Order Experts:
Mon- Fri,
9:00 AM - 6:00 PM (EST)
- Sign In
-
Search
Top searches
Show More
Trending Now
New Arrival
Any questions about Bulk Order?
We're here to help.
Call Our Bulk Order Experts:
1-888-360-8899
Mon- Fri,
9:00 AM - 6:00 PM (EST)
 Call
Call

